Sometimes having an MS DOS bootable USB disk/drive is handy to run legacy applications, Operating Systems and system updates which need the computer to boot from DOS USB or floppy disk. Unfortunately, Windows 10 and 11 do not allow creating a bootable USB drive while formatting. They support only floppy disks in this method. Here is a simple guide on creating a bootable DOS USB disk in Windows 10/11 using a third-party application.
Several utilities are available online for this purpose, but ‘Rufus’ is our favourite. It can create a DOS bootable USB disk in simple GUI steps. Then we can copy the required files for our purpose, like the motherboard BIOS update.
Related: How to Format a disk in ReFS – Windows 10/11 & Server versions
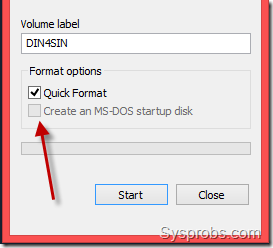
Here is an example of a Windows OS that doesn’t allow the creation of a DOS bootable disk, and ‘Create an MS-DOS startup disk’ is disabled for a USB disk.

Create DOS Bootable USB Disk in Windows 10/11 by Rufus
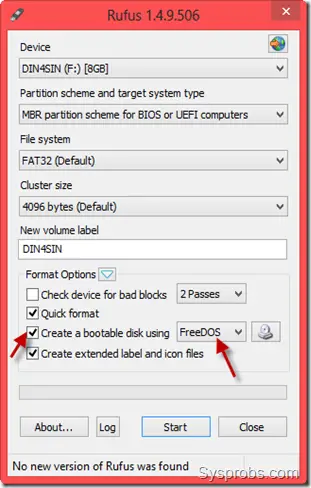
1) Download Rufus from the official site here; it’s a free and lightweight tool. Installation is not required; just download and execute it when the USB is connected.
2) It automatically detects the connected USB disk. Remember, all existing data in the USB will be erased. Select the correct device from the drop-down if you have multiple USB disks connected.
Rufus comes with FreeDOS OS, so you do not need to download any DOS OS here. Therefore, to create a simple bootable DOS USB disk in Windows 10/11, make sure to select ‘FreeDOS’.
Also, select the FAT32 file system from the drop-down. Most DOS systems require a FAT32 file system, not the NTFS.
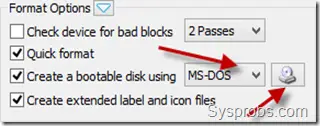
3) If you like to create an MS DOS bootable USB disk, select the MS-DOS version, but you need to have an ISO file of it.
MS-DOS ISO can be downloaded here (Win98_bootdisk.iso). Once you have downloaded the Win98_bootdisk.iso file, browse the ISO while formatting the USB disk as shown below.

Once the disk is formatted, it can boot your computer in DOS OS. Now you can copy the other files (BIOS update or DOS-based programs) to the USB disk by Windows explorer and start using it.
Related: How to disable Secure boot in MS Surface Pro
Connect the USB and restart the computer. Make sure that the USB boot is enabled in the boot order, or you have the option to select it before the real OS boots up. You may need to change the BIOS option to change the booting order. Once you are in DOS OS, you should be able to access the files (you copied earlier) and execute them.


