In this post, I demonstrate how to set up and test VirtualBox teleportation (live migration) of a working virtual machine from one host computer to another. Teleporting is a feature added from VirtualBox version 3.1. It is almost like a failover cluster where we can move the virtual machines among the host computers (cluster members) for high availability.
What is the use of VirtualBox Teleportation?
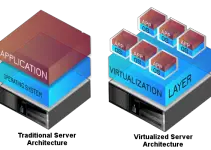
This mainly helps to move most critical virtual machines to other different hosts without shutting down or downtime, which is called live migration in VirtualBox. This feature is most suitable for production environment servers and desktops. Without any downtime, you can move VMs to different hosts and do the maintenance in other hosts.
VB teleportation works regardless of host OS, that means you can move one VM from Windows host to Linux host or Mac Host. It’s better to run same version of VirtualBox in both hosts.
The original VM will be called as ‘source VM’ and another host where you are going to teleport will be called as ‘target VM’.
My Lab Setup
My Source Computer is
1) A desktop computer
2) Windows 7 Host OS (Intel Core2Duo 2.66GHz, 3GB RAM) – Yes, this test was done initially in the year 2010.
3) VirtualBox 3.1.6 (you can try with any recent versions also)
4) The Guest VM is Windows 7 32Bit
My Target Computer is
1) A Laptop Computer
2) Windows 7 Host OS ( Intel Pentium Dual-Core 1.46GHz, 2GB RAM)
3) VirtualBox 3.1.6
TCP/IP network configured between these two computers and I switched off all Windows firewall settings completely. What I’m going to do is while Windows 7 guest VM is working on my desktop host computer, I will migrate the VM to laptop computer without any downtime by VirtualBox teleporting technology.
Basic Requirements for VirtualBox Teleportation
Teleportation or any Cluster technology has certain requirements. The host, guest, networking and storage setup should be met and compatible to migrate virtual machines among the hosts. Here are the requirements.
1) Both hosts should run VB 3.1 or later versions.
2) Both virtual machines in target and source must share the same storage disk.
3) Target and source virtual machines should be configured with a very similar configuration, such as processor settings, memory, display memory, storage type..etc.
4) VMs with snapshots will fail. So delete any snapshots. Both host computers must have a very similar type of processors. Intel to AMD processor live migration may fail.
Steps to Setup VirtualBox Teleportation in Normal PC
1) Before start setting up source or target machines, we need to set up common storage which can be accessed by both hosts over network or fibre network. I installed FreeNAS as a VM on the desktop computer and set up iSCSI disk storage.
Here is the guide to install and setup FreeNAS iSCSI disks in VirtualBox.
2) Add iSCSI disk to VirtualBox media manager. We have to select this disk to install Windows 7 guest VM ( Source VM)
Read more here to add iSCSI disks to VM media manager.
3) Create a new VM Windows 7, select ‘existing disk’ option and select iSCSI disk from media manager which we added in the previous installation.
in this example, win7_1 is VM name ( Source)
iSCSI FreeNAS Storage IP is 10.10.11.250
Desktop Host IP is 10.10.11.11

Continue and complete the installation.
4) Start the VM, install some programs and open them. So once this virtual machine migrated to the laptop computer (different host), we can verify the teleportation.
5) Now go to target machine (which is my laptop). Here also we have to create a virtual machine, but installation is not required. Make sure that this host can communicate to FreeNAS iSCSI server. Add iSCSI disk to VB media manager as you did earlier. Create a new VM Windows 7, select existing disk option and select same iSCSI disk.
in this example, win7_2 is VM name ( Target)
Laptop Host IP is 10.10.11.10
6) Make sure the settings of this win7_2 (Target) exactly matching win7_1 (source).
7) Do not start this target virtual machine. We will execute a command to wait for teleport.
Type following command in target (Laptop) computer.
VBoxManage modifyvm < targetvmname> –teleporter on –teleporterport <port>
My command is
VBoxManage modifyvm win7_2 --teleporter on –teleporterport 1234
Win7_2 – Target VM which will be waiting for teleport to arrive
1234 – Port is listening on the host computer for teleport arrivals. If you haven’t disabled the firewall, then you need to open this port in Windows or any other 3rd party firewall.
8) Now start the target VM. One small progress box will pop and wait for teleportation, as shown below.

9) Go to the source computer (desktop), let’s send win7_1 source virtual machine to laptop by live migration. Issue the following command while VM is working.
VBoxManage controlvm <sourcevmname> teleport –host <targethost> –port <port>
My command is,
VBoxManage controlvm win7_1 teleport --host 10.10.11.10 --port 1234
win7_1 – source VM, migrating to laptop (target) computer
10.10.11.10 – Target host (Laptop) computer IP address
1234 – The port number waiting for teleportation arrival.
10) The teleporting screen changed as shown below in the target laptop.

11) The successful teleporting command will return 100% completion in source machine command prompt.

Also, the source machine VM state changed to ‘teleported’.

VirtualBox Teleportation Failed for me
Because of previous successful screenshots, don’t think I succeeded in the first try of live migration in VirtualBox, it failed for me several times.
1) Teleportation failed in VirtualBox 3.1 with some errors. I didn’t waste my time to fix it or find out the reasons. Directly I installed VB 3.1.6 on both hosts. This solved my issue.
2) I missed removing floppy drive controller in target VM. It should be removed, if not, the floppy drives should share the centralized storage. So, it is better to remove since we will be not using it.
3) Network connection type was different in both VMs. NAT and Bridged, I changed both types identical.
4) Removed the CD ROM controller. Either make it empty or you must share a common CD between both hosts (it is similar to Floppy drive)
5) Source VM storage type was SATA and target was IDE. It failed for me.
6) My Laptop host processor is not having VT. So, when source VM is enabled with VT and Nested paging live migration failed because of VMs processor mismatch. I disabled VT and Nested paging in source VM
After fixed above issues in VirtualBox, teleportation worked fine and quickly. My working Windows 7 VM migrated to different host within 5 seconds.
It’s amazing, an 80MB piece of software does the live migration between different hosts very nicely without any downtime.
Have you tried this in a production environment? Or after this post at home? Share the problems you faced and how fixed them. Also, don’t miss to drop a comment if this post useful for you in VirtualBox teleportation.


Whats up, i been told very wonderful things relevant to the site. and wanted to ask what is actually the difference between it and what you’ve wrote about ? will any one suggest which can be preferred ?
Thanks for your article
It is one of the best i have read.