Windows Update in previous Windows OS releases was easy to manage. But from Windows 10 onwards it is not possible to do that easily i.e. end-user cannot disable or stop this feature from the control panel or settings options available in Windows Update.
In this article, we will talk about the ways to disable Windows 10 automatic updates permanently or how we can stop Windows Update for temporarily getting downloaded. Catch us after the jump.
Why Do We Need to Disable Windows 10 Update?
It is always recommended to install updates on any Microsoft Operating Systems including the Windows 10 on your home PC. Because, usually it comes with the security updates, bug fixes for any vulnerabilities, drivers update, new features, and enhancements. So, why to miss them?

But in a few cases, you may need to disable the auto Windows updates. Here are the possible reasons.
- The recent update is causing issues on the Windows 10 computers. That is the talk of the town. So, you are waiting for Microsoft to fix and release another update.
- Your existing hardware and programs may not work with the latest update.
- Your PC doesn’t have enough space on C drive to download and install the updates. So, you need to disable the auto-update for sometimes till your clear disk space.
- You are doing something important on the PC and it can’t be rebooted any time soon. So, you need to delay the auto-update and install.
- You always update Windows 10 manually during the major releases only. So, do not want to install minor updates automatically.
The list can go on like this, but whatever reasons, we have the solution to disable Windows 10 updates permanently or temporarily.
Three Ways to Disable Windows 10 Update Permanently:
- Disable Windows Update using Windows Settings
- Using Windows 10 Services (services.msc)
- By editing Windows 10 Registry using regedit
Before we begin, we would like to inform making changes to Windows OS may break/damage the PC permanently, hence it is always advised to take a backup of the OS using Windows Restore Point creator or third-party tools.
Steps to Disable Windows 10 Automatic updates
1) Disable Windows Update – Windows Settings:
This is one of the easiest ways to disable Windows Update on Windows 10 OS. In this method, the system will disable the updates for a limited period.
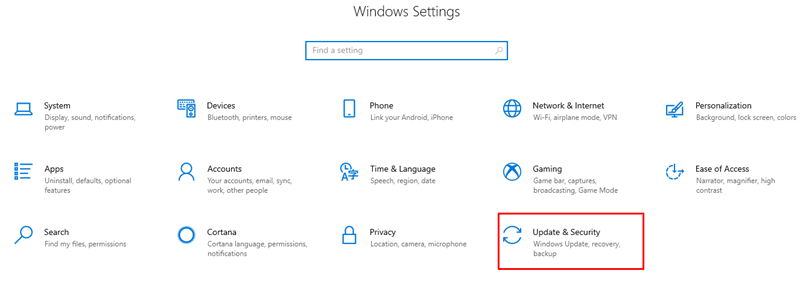
- Go to Start -> Type “settings”
- Click on “Update and Security” option -> “Windows Update” option
- Go to “Advanced Options”
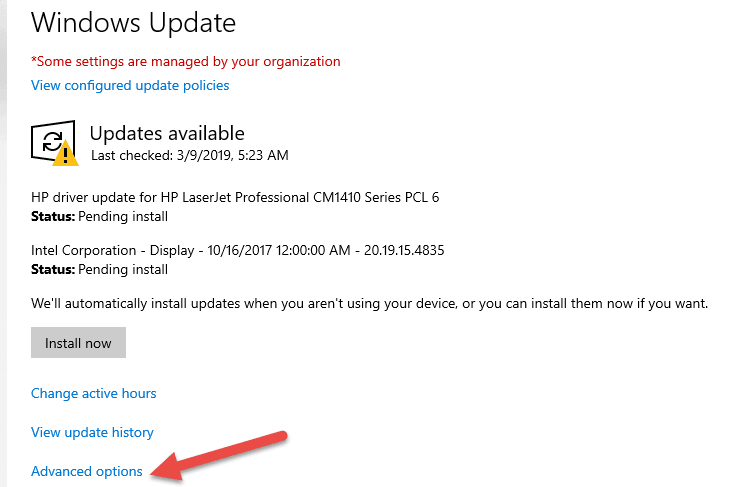
- Select under “Pause Updates” section, the duration for which you want to disable the updates
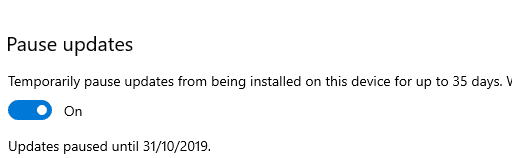
- Once done with the above step, the system will not receive any Updates for that period
- The length of disabling the updates can be increased/decreased at any point of time based on the requirement.
2) Disable Windows 10 Update – Using Services.msc:
- Press Windows + R key on the keyboard to open “Run” Window
- Type “services.msc” -> enter
- Look for “Windows Update” and “Windows Update Medic Service”

- Select “Windows Update” -> Right-click -> Properties-> Startup Type -> select “disabled” -> Apply-> OK
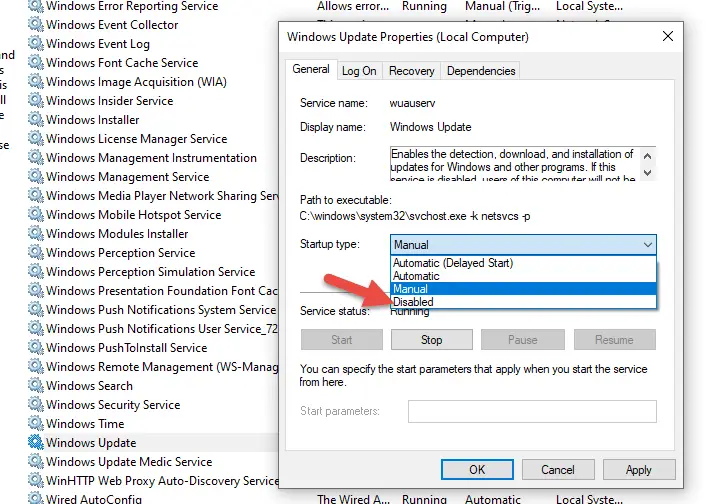
- Repeat the above step for “Windows Update Medic Service”
- Voila! You have successfully disabled Windows Update on Windows 10 permanently.
3) By Editing Windows 10 Registry using regedit:
There are two ways to restrict Windows 10 Update via registry i.e. limiting the update download and disabling updates permanently.
By limiting the update, the user can prevent updates for getting installed automatically and the user can pick which one they want to install.
Limiting the Updates using regedit:
- Press Windows + R key on the keyboard to open “Run” Window
- Type “regedit” -> enter
- Click on HKEY_LOCAL_MACHINE folder -> Software -> Polices-> Microsoft-> Windows
- Now you will reach here HKEY_LOCAL_MACHINE\SOFTWARE\Policies\Microsoft\Windows
- Click on “Windows” folder that you have selected in the previous step
- Do a Right click -> New -> Key
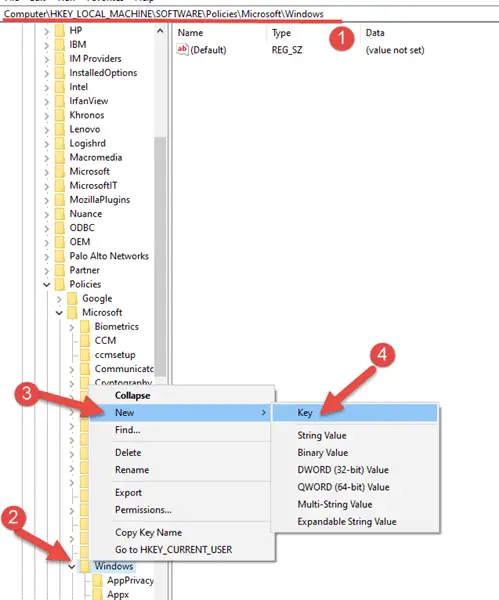
- Enter the name as “WindowsUpdate” and enter to save
- Now select “WindowsUpdate” and right click -> New -> Key
- Give a name for Key as “AU” (automatic update)-> enter to save. So, you will have the keys like below now.

- Click on the white area on the right-hand side of the registry editor Window -> Right click -> New -> DWORD (32-bit) Value
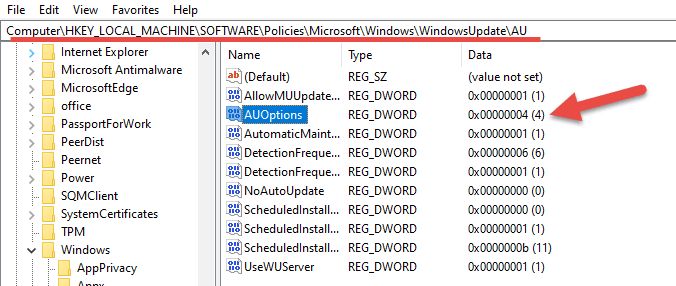
- Repeat the above step and this time name the Key as “AUOptions” (automatic update options)-> Enter
- Here comes the interesting part, double click on the two keys you have created, and it will ask to change the value as Value Data
- Enter the value in Value Data field as:
2 – To notify for download and install updates
3 – To auto-download Windows Update and notify the user for installation
4 – Will automatically download Updates and installation will be scheduled
5 – Value 5 is for local admin users to choose and manage Windows Update settings
- After picking the relevant value of your choice, enter in “ValueData” field for “AU” and “AUOptions” and hit enter save.
- Close registry editor Window and restart the computer
Disabling Windows Updates using regedit:
These settings are to completely disable the Windows 10 auto-updates. We need to visit the same place in Registry as mentioned in the earlier step and change the keys.
- Press Windows + R key on the keyboard to open “Run” Window
- Type “regedit” -> enter
- Navigate to HKEY_LOCAL_MACHINE-> Software -> Polices -> Microsoft -> Windows
- Click on “Windows” folder that you have selected in the previous step
- Do a Right click -> New -> Key
- Enter the name as “WindowsUpdate” and enter to save
- Now select “WindowsUpdate” and right click -> New -> Key
- Give a name for Key as “AU” (automatic update)-> enter to save
- Click on the white area on the right-hand side of the registry editor Window -> Right click -> New -> DWORD (32-bit) Value
- Create a new key on the right side of the registry Window -> New -> “NoAutoUpdate” -> Enter
- Open each newly created Key’s “NoAutoUpdate” / “WindowsUpdate” and change their current value from “0” to “1” -> Press “Ok”
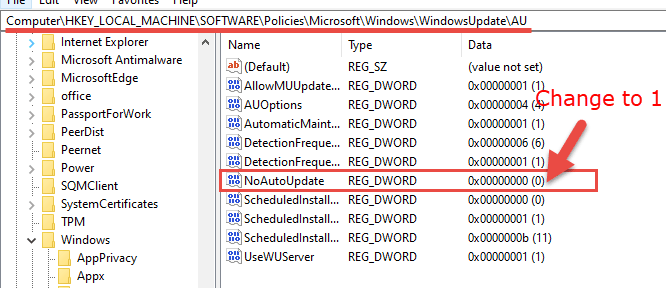
- Close the registry editor window and restart the computer
Apart from above-listed methods, there are some advanced methods to disable Windows Update like by editing Group Policy.
This method is more commonly used by the administrator in school/college/institutions to enable/disable Windows Updates. Editing Group Policy brings in more control over any other ways to manage a task for devices running on Windows OS. We’ll cover this method in our future post.
Wrapping Up
There were times when Windows user didn’t want to keep their computer up to date with Windows Update and it was working fine. But, from Windows 10 onwards users were forced to keep their PC up to date because Microsoft moved Windows OS from Standalone to Windows as a Service i.e. WAAS. In which any new update or feature or new releases will be made available.
By moving from Standalone to Windows as a Service i.e. WAAS Microsoft has made it clear that they are not going to roll out another version of Windows OS. In place of that, they are going to keep updating the current Windows 10 build and add more features as they move forward.
Microsoft is also planning to move their current purchase model of the new OS from standalone to Subscription-based which will bring transparency in terms of revenue growth.
Do let us know how you liked this post also share your valuable feedback and comments to improve this platform.


Note. Disabling the Windows Update service will also break the Microsoft Store on your PC.
This is the best way that I have found.
* Go to C:\Windows\System32\Tasks\Microsoft\Windows\UpdateOrchestrator
* Find the file “Reboot” and remove/delete it. (This is the task that actually kicks off reboots after updates are done.)
* Create a folder in the same location named “Reboot” — This prevents Windows from automatically recreating the file.
With this setup, Windows will still install updates but the user is in control of when the reboots happen.
That is a good point. Thank you!