Outlook is Microsoft’s email platform catered towards both personal and professional use. It is designed to manage massive amounts of email with more than one account set up under a single umbrella.
However, locating a single important email among hundreds or thousands is quite difficult – like a needle in a haystack.
Thankfully, you can conduct an Outlook search by date and locate the email you want to read. In addition, Outlook’s search feature enables you to search an email by its date or date range. There are actually different methods, and we have explored them in the following article.
Sort Outlook By Date
first, you would want to sort your Outlook inbox by date, and that way, the newest email will always be on top.
It involves a few easy steps. Here are they.
- Launch Microsoft Outlook on your Windows computer.
- Navigate to the inbox.
- On the top-right corner of the “Inbox” window, you will see the By Date option.
- Click the Down Arrow and choose the Date option under “Arrange By.”
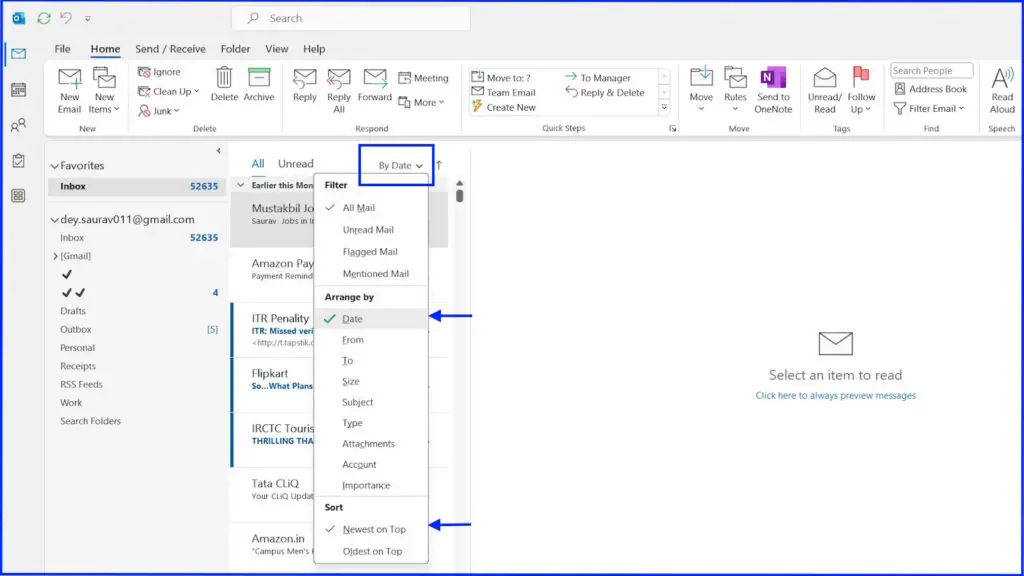
Note: You can also go slightly below, to the “Sort” section, and select Newest on Top or Oldest on Top.
On the other hand, you can click the View tab, and under the “Arrangement” box, you need to click the Date option to sort your inbox by date.

How to Conduct an Outlook Search By Date
It is easy to conduct a search by date on Outlook. However, you can utilize two methods to locate the email or emails you desire.
You can try the Instant Search option, which is simple but gets the job done or you can try the Advanced Search, which is a bit complicated.
So, without further ado, let’s dive into both of these methods in detail.
Outlook Search By Date (Instant)
You can also conduct an Outlook search by date using the Instant Search. It is the handiest option, located at the top of the Outlook window. Here are the steps to use it.
- Launch Microsoft Outlook on your Windows computer.
- Navigate to the top of the window and locate the instant search bar.
Note: Alternatively, you can employ handy keyboard shortcuts like F3, Ctrl + E, or Alt + Q to access it.
However, you need to type the keywords in the instant search bar in a specific way to conduct an Outlook search by date.
Type the keywords (Sent/Received) in the box, add a Colon(:), and then type the date to initiate the search.
For example,
You need to search for emails received on the 28th of January, 2024. So, you need to type the following in the search bar and hit Enter.
Received:28-01-2024

However, if you are typing more than one keyword in the search box, you need to add Quotation (“”) to ensure Outlook properly identifies the data.
For example,
Sent: “past month” or Received: “past month”
So, if you remember the week or month but not the date specifically, use this method to locate the emails you desire.
However, the keyword placement will be different if you don’t remember the specific date but have a date range.
For example,
You need to locate a specific email you received between 20th January 2024 and 28th January 2024. So, type the following in the search bar.
Received:20/01/2024..28/01/2024
Note: The date format could be DD/MM/YYYY or MM/DD/YYYY. Either way, the result will be the same. Also, don’t forget to add Two Dots (..) between dates. Lastly, make sure there are no spaces between the date range. Otherwise, Outlook won’t recognize the entered date range.
Additional: Add The Search Bar in Outlook Permanently
While the search bar is “The” key element to the Outlook search by date, a lot of users have complained about the “Search Bar” not being there.
There’s no need to panic. You can add the “Search Bar” in Outlook through a few easy steps. Here they are.
- Launch Microsoft Outlook on your Windows computer.
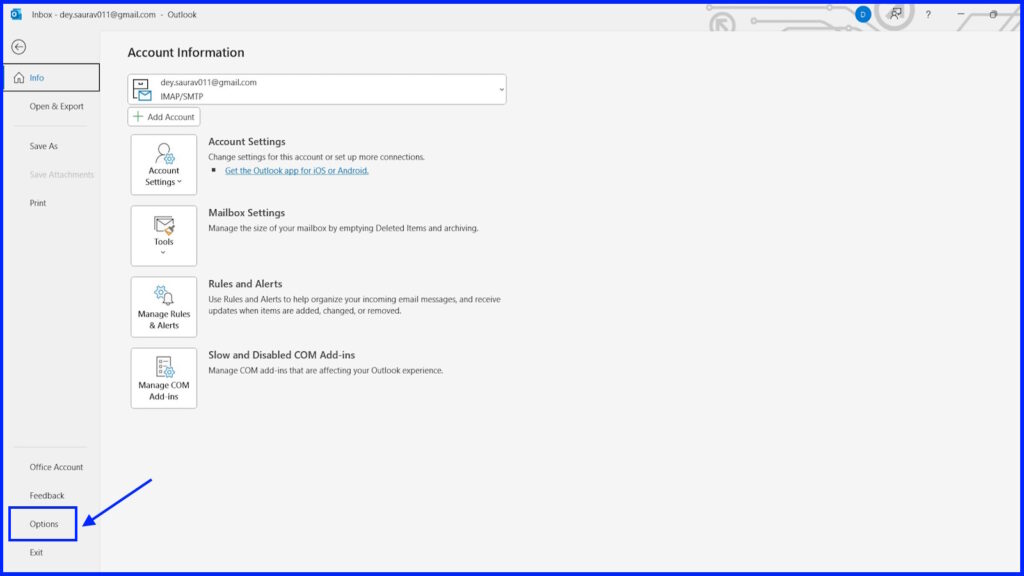
- Navigate to the File menu on top.

- Click Options at the bottom left corner of the window.
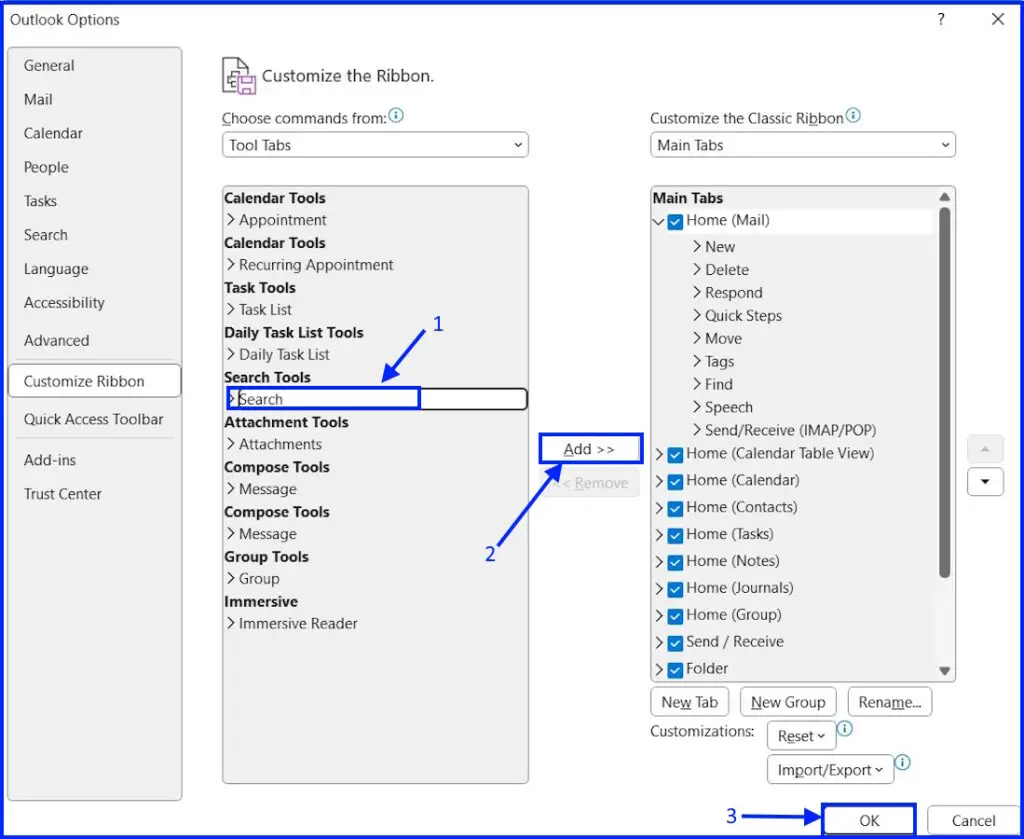
- On the left side of the “Outlook Options” panel, click Customize Ribbon.
- Under the Choose commands for section, select the Tools Tabs from the drop menu.
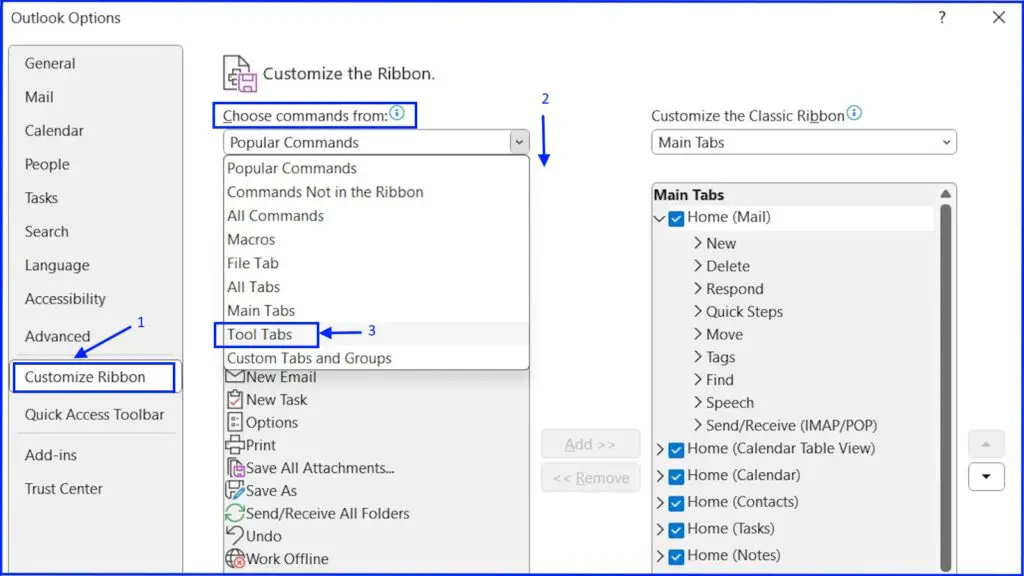
- Locate and click the Search Tool and click Add.
- Click OK to apply the changes.
If the “Search Bar’ wasn’t available before, it will now be available permanently, as it simply needed the activation.
Re-launch Microsoft Outlook, and the search bar will be there.
How to Conduct an Outlook Search By Date (Advanced)
Besides the Instant Search, Microsoft Outlook has the Advanced Search option, which is a more detailed way to conduct an Outlook search by date.
However, this method requires you to filter your needs by multiple criteria and that includes dates.
The steps can be a little complicated. So, let us show you what to do in detail.
- Launch Microsoft Outlook on your Windows computer.
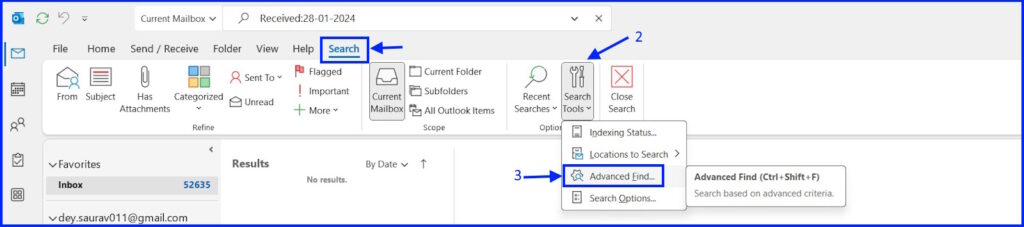
- Click the Search option on top to open the Search Tab.
- Click the Search Tools icon.
- Choose the Advanced Find option from the drop menu.
Note: Alternatively, press Ctrl + Shift + F.
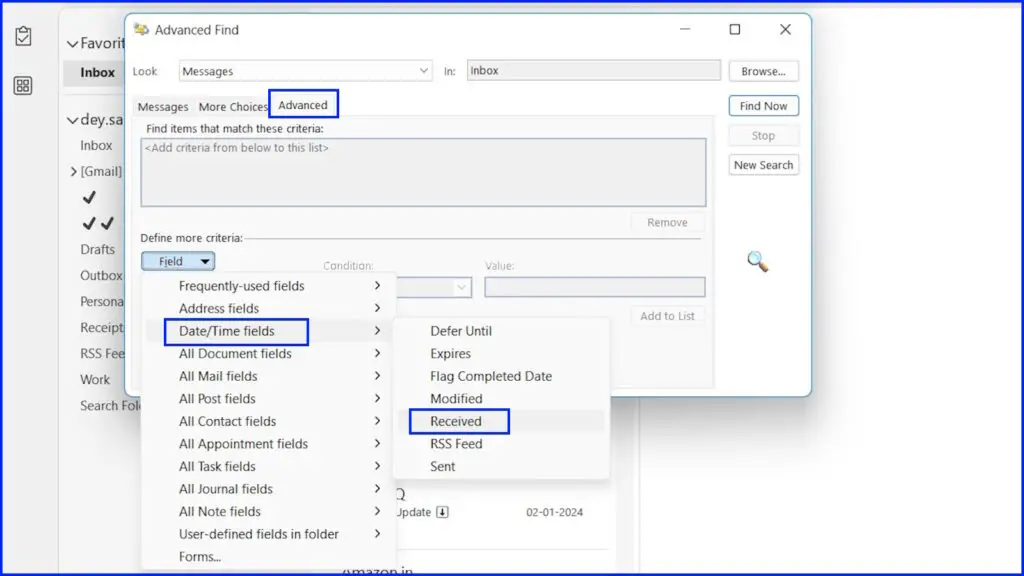
- On the pop-up window, select the Advanced tab.
- Under Define More Criteria, click the Field button.
- Choose Date/Time from all the available options. After that, select your preferred option from the drop menu. In our case, we have selected the Received option.
- Click the Condition button and set it as you desire.
- Enter the date in the Value section if you have a date range – if applicable.
Note: You have to enter the date in a specific format – <Value 1> and <Value 2>
- After setting the value, click the Add to List button.
- Lastly, click Find Now to initiate the search.
Summing Up
That’s all, folks! Conducting an Outlook search by date isn’t essentially difficult. Microsoft Outlook is flexible.
However, there are specific ways to input the data for the search criteria, and you need to follow it exactly as mentioned in the article.
You can search email by date, date range, month, week, year, and more. There are multiple options. Hence, searching Outlook for specific emails isn’t so difficult, despite the popular belief.