This guide shows how to export or convert VMware Workstation virtual machine to an ESXi server using the vCenter converter. Sometimes you need to move/migrate a pre-configured server OS virtual machine to VMware vSphere (ESXi) to save time by avoiding installation and configurations.
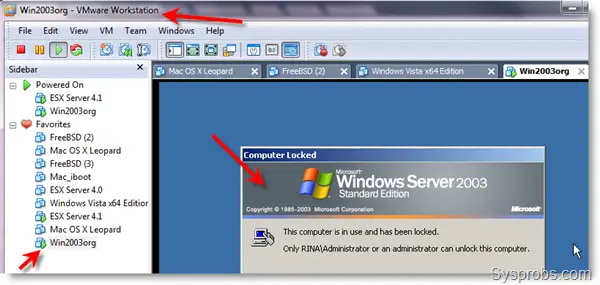
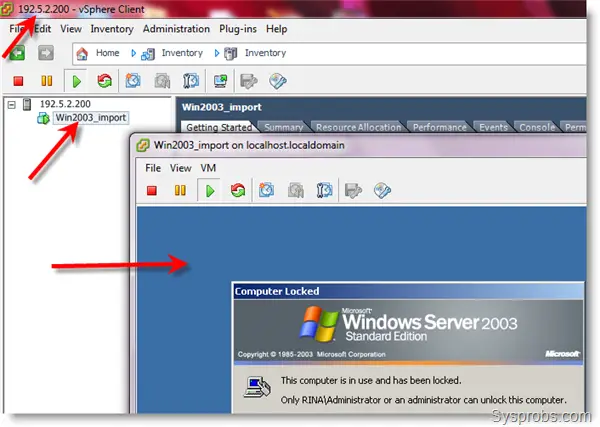
We can use any virtual machine with configuration file VMX and disk files here. I have a working ESXi server and Windows 2003 enterprise OS (already configured as Domain controller) as a virtual machine in the VMware workstation. Though this setup was done in 2010, it is applicable in recent times also.
Here is the working OS.
Steps to Convert VMware Workstation VM to ESXi Server
1) Uninstall VMware tools from guest OS. I’m not sure whether workstation and server VMware tools are the same, but removing them and installing them later is better.
2) Shut down the virtual machine and remove floppy drives and USB and sound devices. The converter will remove them if you are not removing them with a warning message later.
3) Ensure network connectivity is working and firewall ports are opened between VMware workstation and ESXi host. Go to File on the menu in the workstation and select Import or Export.
See Also: Convert Physical Computer to Virtual by VMware Standalone converter.
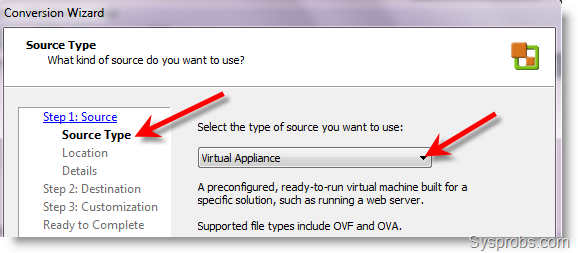
4) Select Virtual Appliance in source type.
5) Browse the virtual machine’s configuration file VMX on the next screen as shown below. Since the VMX file has the details of Snapshots VMDK files, it will take care of them while converting.

6) It should detect the configurations of the virtual machine properly. On the next screen, you can select and resize the disks which should be exported.

7) Now time to select a destination. Select ‘VMware Infrastructure Virtual Machine’ and click next.
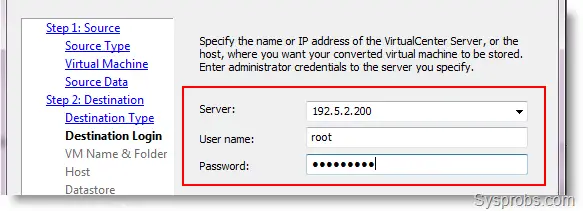
8) Provide the IP address of the VMware ESXi server with the root user name and password. The exact details used to connect through the vSphere client.
9) It should log in without issues and ask for a VM name. Give a name and go to the next step.
10) Select the resource pool to export if more than one is available. Otherwise, select the localhost and press Next.
11) Choose a datastore to move the virtual disk. My server has single data storage as below.

12) Next is to select network cards. Network Cards can be added during export by choosing the number of NICs.

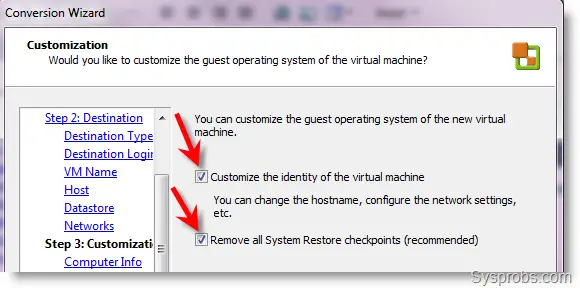
13) Selecting both options on the next screen is highly recommended. Customizing the identity of the virtual machine is very important in a production environment due to unique machine ID, hostname, licensing and domain networking.
System restore checkpoints are useless after converting since any time we can’t restore to earlier checkpoints because of the different hardware environment.
14) After completing the customization steps, check the summary before starting the process. Select the Power on the new VM after the creation (Optional) option and click ‘Finish’ to start the procedure.

15) Conversion and export should run smoothly and complete successfully. Warning messages can be seen in the progress dialogue box.
It failed initially because of space issues on my VMware ESXi Server. There was no space on my host computer to grow the VMDK file.
Export succeeded after fixing the space issue. Since I selected the power-on option, the exported virtual machine was up and working on the server after the conversion was completed.
It is a straightforward method if all settings are correct. This will help configure and test Operating Systems on the local computer before exporting to live VMware ESXi servers.
Bonus Method:
The latest VMware workstation (ver 16 and later) supports direct connectivity to the ESXi environment.
If the VMware ESXi host can accept the connection from the Workstation console, we can establish the connectivity by providing proper credentials. Once the connectivity is made, converting or migrating the existing VM from the VMware workstation is easy.
Select the virtual machine, go to ‘VM’ on the menu and ‘Manage”. Here select the ‘Upload’ option. Select the ESXi host we connected previously and start exporting the VM.
You can find the detailed steps here.
![[Guide] How to Merge Snapshots in VMware Workstation?](https://www.sysprobs.com/wp-content/uploads/2010/09/p2v-in-virtualbox-by-disk2vhd-211x150.png)


Hi, Nice job on the explanation. I finally have a virtual machine on my esxi 4.1 server. I installed Leopard fine and built the CDR from the retail. Lacking a DL DVD, I had to install macdisk on the PC running the VSphere client. Then just attached an external mac formated USB to the virtual machine and voila Snow Leopard on the ESxi server.
But this is not very satisfying – I am still struggling with trying to get OS X onto a home brew system. Looks like the rest of the day will be spent researching that little project.
Regards
hi.tnx
How do you export a Windows 2008 R2 x64 VM from VMware workstation
Nice article. File->Import or Export. seems to be missing in VM Ware Workstation 8. Any idea how I can do it in that version?
File>Export to OVF
Does one even need to do any of this to go from Workstation 7.x to ESXi 5.x?
Thank you for that walk through. It was well done and your images made the task quite simple.
Regards,
Tom
I made a conversion from ESXi5 to Workstation 7, didn’t remove the tools.
Well so I do it again… you better remove the tools as described. (You can only UPdate not DOWNdate)
can these steps be used to move/convert an ESXi 4.1 VM to Workstation 7 or is there another option?
Hi,
Please help me,, recently i have created one VM workstation 7.1 for Windows XP OS.
In that VM workstation i am running Oracle Database .
I wanted to Migrate this Windows XP from Workstation to VM server , Is it Possible ??
What are the thinks i have to do. without down the Windows XP Os because User accessing the DATABASE.
Workstation Installed in Windows 2008 R2
Regards
Hamid
Just FYI, Your Article worked like a charm converting a Virtual Machine from Workstation 7.1.5 to EXSI Server 5.0 Update 1. A Most useful guide!
Thanks, we where using workstation 8 and the import has moved to open now.Referenced
http://www.techieshelp.com/how-to-export-a-virtual-machine-from-vsphere-5-to-vmware-workstation-8/