VMware products have a built-in tool called OVFtool to export Virtual machines in the format other products can understand. It can export the virtual hard disk and VM configuration. This is the proper way to migrate or convert your VMware workstation or VM Player VMs to other platforms, including cloud infrastructure.
It’s a command-line tool available in the VMware Workstation or VMware player installation directory. In this post, let me explain how to export a VMware virtual machine to OVF format, then import the particular OVF in VirtualBox.
Don’t you wonder why we have to use this tool when VirtualBox natively supports VMDK disk files? That was a good question. Oracle VirtualBox can directly use VMware’s virtual hard disk file format VMDK as a VM’s hard disk.
Check our guide about importing a VMDK file into VirtualBox. But, the OVF tool does the export in a professional manner, so you can publish on the Internet and share your virtual machine with others. Open Virtualization Format (OVF) is an industry standard that describes metadata about virtual machine images in XML format.
Importing a virtual machine in various virtualization software platforms with OVF format is very easy since it has pre-configured Virtual machine settings. VMware vSphere console has a GUI-based OVF tool to export a VM and distribute it to different hosts or even different organizations.
Here we will discuss the export option with the OVF tool on Windows 10/11 clients with VMware Workstation or VMware player.
You can download OVFtool from VMware official site if you are using older products of Workstation or VMPlayer.
In this example, I will export a VMware VM (Windows 7 guest) to OVF format and import it into Oracle VirtualBox. I will be using the GUI and CLI methods here.
Even though my guest VM is older OS, you can use this method for any guest VM, including Windows 11, Linux, or macOS.
Export VMware VM to VirtualBox by OVF
Here are the things you must consider:
a) Uninstall VMware Tools from Guest OS VM (From Control Panel) and restart. The guest additions tool from VMware workstation, Player, or vSphere will not work on other platforms; in our example, it is Oracle VirtualBox. Preparing a VM without the guest additions of particular virtualization software is always better.
b) Remove the sound card, network, and CD ROM from VM settings (if you are going to import this OVF in VMware products, then this step is not required, but for VirtualBox, it’s required.). Here is a thread about this.
c) The VM should be completely powered off (not in a saved or suspended state).
Export a VM to OVF by GUI in VMware Workstation
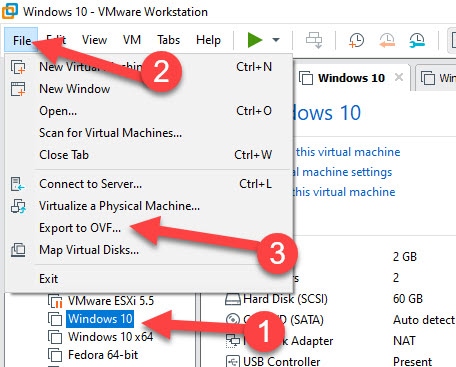
In VMware Workstation, select the VM (which meets the earlier conditions), then click on File –> Export to OVF, as shown below.
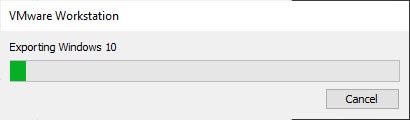
Choose the OVF file name and location to save the export. Make sure that the destination has enough space. If everything is fine, the export process will start and complete successfully.
Create OVF Export by OVFTool in Command Prompt (VMware Player)
If you have only the free VMware player, the built-in GUI VMware OVF tool is unavailable. In this case, we need to use the CLI as described below.
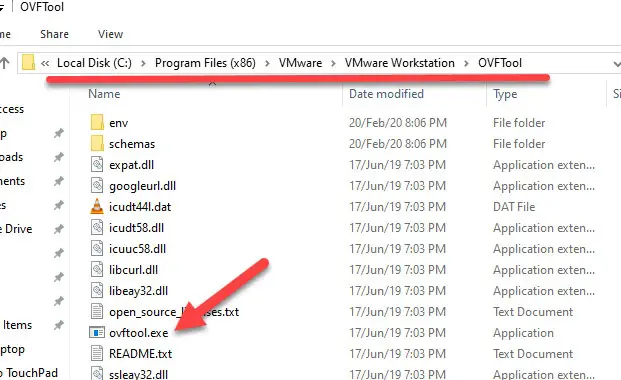
1) If you have the latest VMware products, you can find ovftool.exe here.
Program files -> VMware – workstation or VMplayer – > OVFTool folder.
If you have older versions and the OVF tool was installed manually, then it will be available under
Program Files – > VMware -> VMware OVF Tool.
2) Set the Windows path in Environment variables to enable running this command from any location; otherwise, you have to execute this command from the correct path folder.
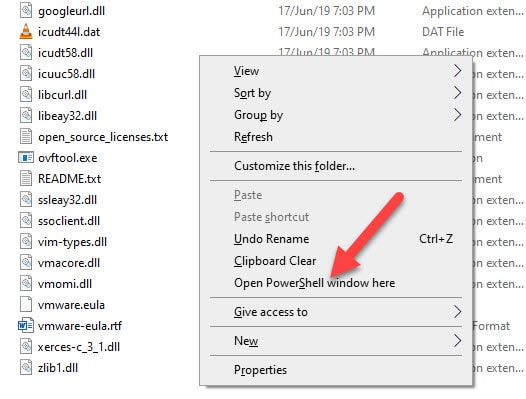
From the location of OVFtool, hold the SHIFT key and right-click. This will bring the option to open the command prompt (or Powershell) from this location.
3) Here is the syntax of the command.
ovftool "path of VM vmx file" "path to keep the export"In my example, the following command will export a Windows 7 VM to OVF format.
Ovftool windows7.vmx f:/win7export/windows7ovf.ovfSince I added OVFtool to Windows RUN variables, I was able to execute this command from the Virtual machine’s folder, so giving the vmx file name worked straight away.
F:/win7export/windows7ovf.ovf is the destination (I created the “win7export” folder already)

4) Successful conversion created vmdk disk and ovf file as below.

Import OVF in VirtualBox
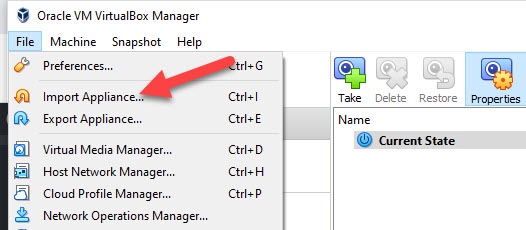
5) Open VirtualBox and click on File, then select Import Appliance.
6) Press the Choose button, browse the converted ovf file, and press Next.
7) You are almost ready if you get to the next screen without problems. Otherwise, you need to open the .ovf file in a text editor and fix the errors.
You can check this guide about the possible errors and how to fix them when you export a VM from VMware and import it into VirtualBox by OVFTool.
8) Don’t forget to install VirtualBox additions in the guest VM once imported.
Alternatively, you can convert the VMDK file to VDI and migrate a virtual machine from VMware to VirtualBox.
If you are looking for another way around exporting a VM from VirtualBox to VMware, you can read this guide. This guide shows how to properly export a virtual machine in VirtualBox that can be moved to different hosts and virtualization software.
Related Questions:
How do I export a VMware virtual machine to the OVF package?
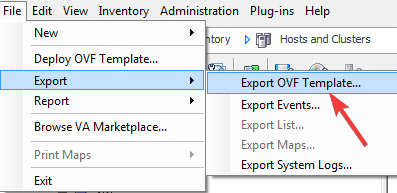
Exporting a VMware virtual machine to OVF package is relatively straightforward. First, launch the VMware vSphere or Workstation console, select the virtual machine you want to export, and then choose the “export to OVF template” option. If needed, specify what type of image format should be used to save the VM. Finally, provide a destination folder for the VM (OVF) package – this will serve as a remote storage location for the new exported VMs. The process may take several minutes, and when it’s complete, you will have an OVF file containing your entire VM configuration available.
Can the VMware player import OVA?
Yes, VMware Player can import OVA files. This feature is available with the Pro version of VMware Player. OVA files are packages that contain multiple files, such as an operating system, application programs, or other components. To import an OVA file into VMware Player, open the “File” menu and select the “Import Appliance” option. Then select the OVA file from their storage device and click “Open.” After that, you will be guided through a series of steps to finish importing their OVA file into the VMware Player software.
How to export OVF to OVA?
The easiest way to export an OVF to an OVA is by using a virtualization program such as VMWare vCenter Converter. All you need to do is select the source (OVF in this case) and then select the destination (OVA). You can then click convert; the process should be completed without problems.
What is the difference between OVA and OVF?
OVA (Open Virtual Appliance) is a single file containing the virtual machine and its configuration. At the same time, OVF (Open Virtual Format) stores the virtual machine information in multiple files, making it more flexible and easier to use.
Do let me know how this migration process worked for you. Have you faced any issues in importing the OVF file in VirtualBox?

![[Guide] How to Merge Snapshots in VMware Workstation?](https://www.sysprobs.com/wp-content/uploads/2010/09/p2v-in-virtualbox-by-disk2vhd-211x150.png)


Gracias por los comentarios. Muy buen sitio, sigue así!
Thanks for the article. This help me to import VCSA into my vmware workstation. Cheers
This work´s perfectly for my.
Thank you very much.
(VMware Player to VirtualBox)