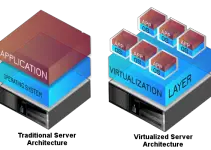
With the help of free virtualization software such as Oracle VirtualBox, we can have multiple Operating Systems on the same hardware. This guide shows how to install Ubuntu 19.04 on VirtualBox with the Windows 10 host computer. The same steps can be followed to install Ubuntu 19.04 on macOS computers such as MacBook Pro or Air as long as you have the latest VirtualBox.
Also, we mention how to install the working guest additions on Ubuntu 19.04 and set up shared folders between Linux guest and Windows 10 host computers. Ubuntu 19.04 Disco Dingo for desktop and server is one of the latest major releases. It is always better to install in the demo/test environment before implement in the production. VirtualBox is one of the free and best virtualization software you can use on Windows, Mac, and even Linux physical computers to create multiple various virtual machines. You can create the best test Ubuntu Disco Dingo environment with the VirtualBox.
New features of Ubuntu 19.04 can be found in the official site here. You need to have enough hardware resources such as processor cores, RAM and good hard disk to install another popular Linux OS top of your working Windows 10 computer.
Prepare the Environment
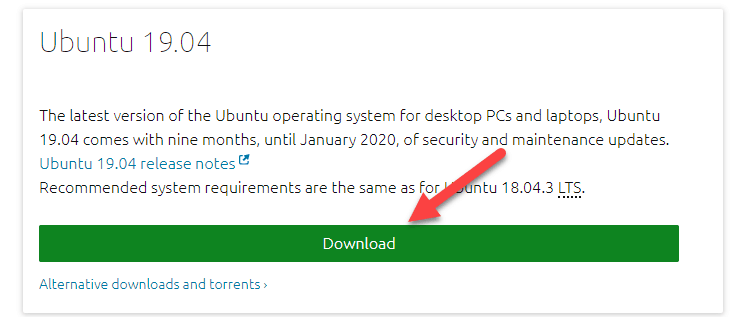
- Download the correct ISO. Visit the desktop version to download and select the latest version.
- Make sure you have the latest version of VirtualBox. As they support and enhance Linux versions in every release, it is better to have the latest version.
- Install the VirtualBox extension pack. This is nothing to do with the guest VMs. It has to be installed on the host computer. It improves the interaction between the host computer hardware and VirtualBox kernel.
Install Ubuntu 19.04 on VirtualBox – Windows 10 Host
Step 1) Download the correct ISO from the official site.
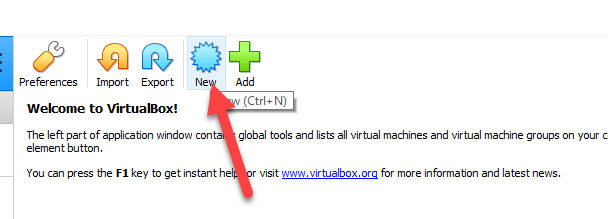
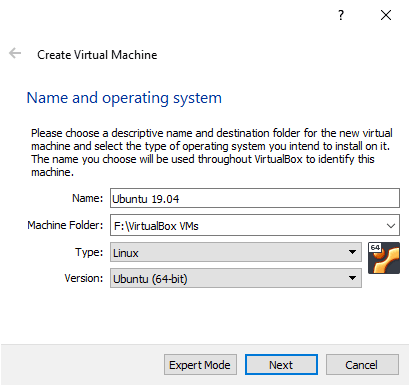
Step 2) Create a new virtual machine. Give a proper name for VM.
Once you enter ‘Ubuntu’ in the name field, it will automatically change the VM type to correct Linux version.
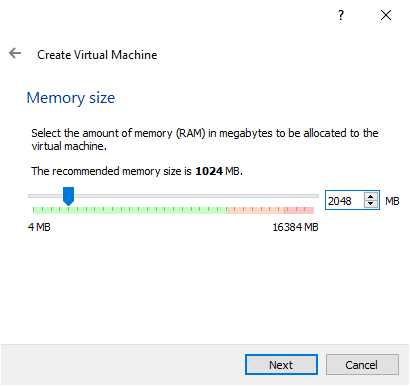
Step 3) Assign enough RAM. Ubuntu 19.04 requires a minimum 2GB of RAM. If your physical computer has more resources, then set more RAM, maybe 4GB. You can read more about the system requirements here.
Step 4) Create a new virtual disk. Select ‘Create a virtual hard disk now’ and VDI type in the next screen. VDI is the native virtual hard disk format of Oracle VirtualBox. Choose ‘Dynamically allocated’ option to save some space on the physical computer at the moment.
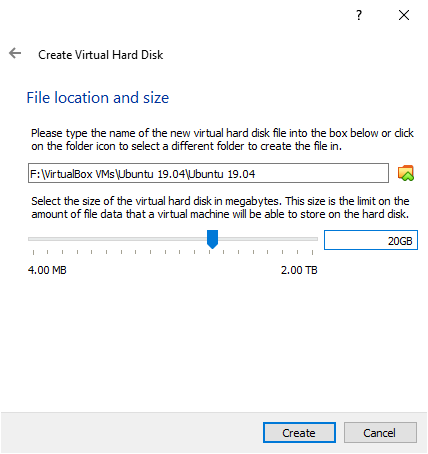
If you are installing Ubuntu 19.04 on VirtualBox for production usage where the sudden data growth is expected and good disk I/O needed, then select the ‘Fixed size’ option. Since we are installing for testing purpose, Dynamically allocated disk will do the job well. I set 20GB for disk space.
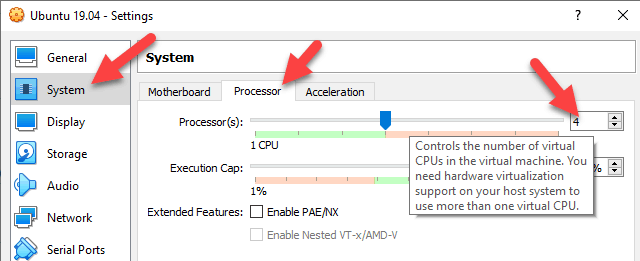
Step 5) Let’s do a few more tweaking before starting the VM. Click on the settings of VM and go to processor settings. Mostly it would have created with the 1 processor core. It is recommended to increase 2 or more if your physical computer processor has more cores. The more cores you assign the more powerful will be your Linux VM.
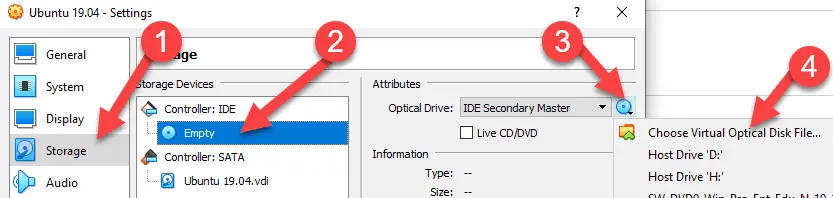
Step 6) Mount the ISO to the virtual machine. Go to ‘Storage’ option to attach the downloaded Ubuntu ISO file. Select ‘Choose Virtual Optical Disk File..’ and browse the ISO file.
Once the ISO file attached successfully, power on the virtual machine.
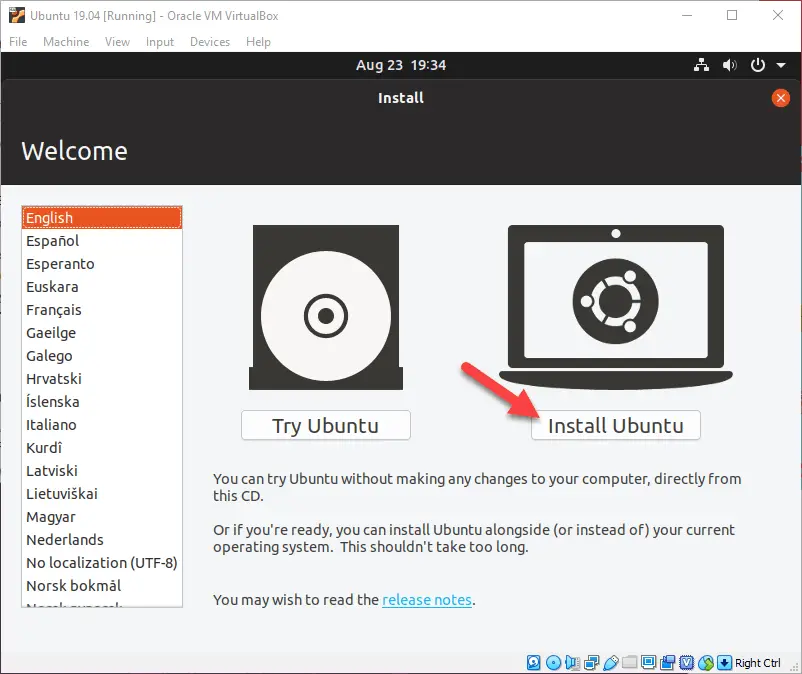
Step 7) In the first screen, choose ‘Install Ubuntu’ because that is what we are going to do now. Other option will enable you to try the Ubuntu without installing on the hard disk. It is almost like running an Operating System from Live-CD. In this example, we properly install the OS on the virtual hard disk.
The other installation steps are straight forward like any other Linux distribution. We are not covering every step here. Make sure to have a right password for the user.
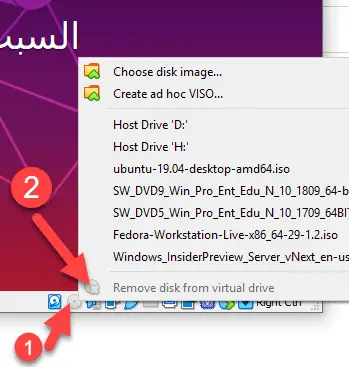
Step 8) Once the installation completed, remove the bootable ISO file from the CD drive, otherwise either it will try to boot from the ISO to install OS again, or it will wait for you to unmount the ISO without booting.
Right-click on the CD icon of VM console and eject the attached ISO once the installation completed.
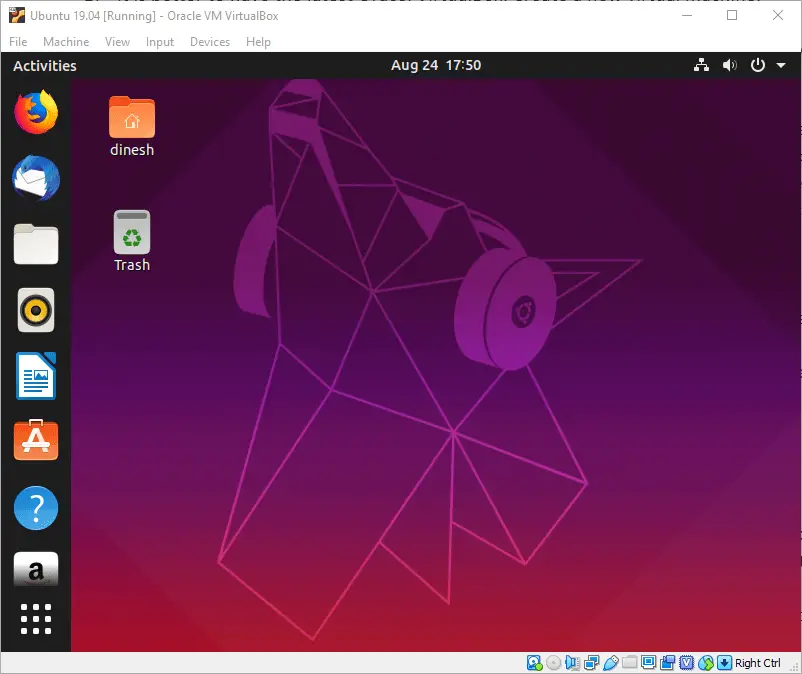
Here is the initial working Ubuntu 19.04 on VirtualBox with Windows 10 host computer.
First thing first, take a snapshot before do any further changes.

Now we will see how to install guest additions on Ubuntu 19.04, and other additional features such as VirtualBox shared folders and bi-directional data transfer on Windows 10 host computer.
Install VirtualBox Guest Additions for Ubuntu 19.04 on Windows 10
Guest additions need to be installed to get the full screen and smoother display. Not like Fedora (Latest Fedora comes with in-built guest additions), we need to install Guest additions on Ubuntu.
Just to recap before proceeding further steps: confirm the following points.
- You have installed the VirtualBox extension pack matching with the version of current VirtualBox.
- Taken the snapshot of VM
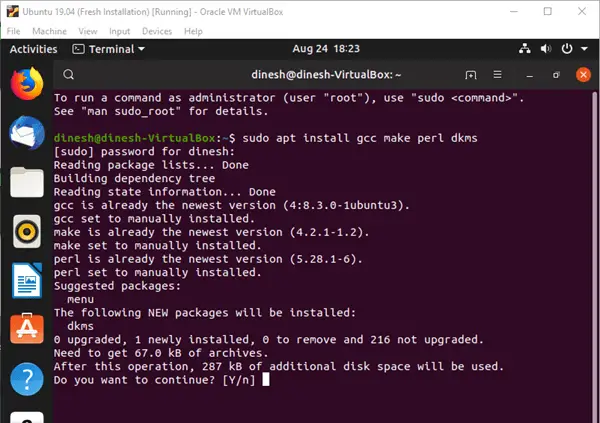
Step 9) To install the guest additions, execute the following command from Ubuntu 19.04 terminal. Internet connectivity is required to download additional packages. If the physical computer has Internet, then your VM also will have Internet access via NAT network type.
sudo apt install gcc make perl dkms
After above all modules installed, attach the guest additions.
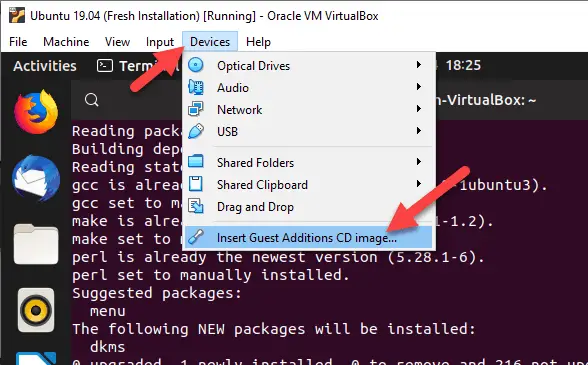
It will pop-up to run the installation like below.
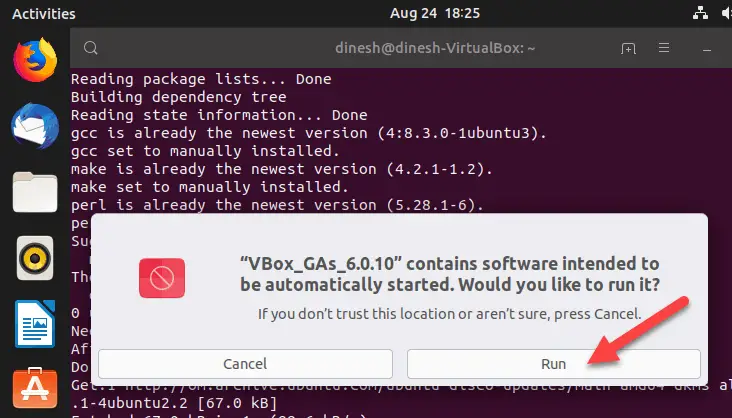
If not, you can execute the following command.
sudo /media/$USER/VBox_GAs*/VBoxLinuxAdditions.runNeed to restart the VM after guest additions installation.
You will notice the smooth mouse movement and interaction inside the VM. Also, the full-screen view will work now. Those are the main indicators of successful installation of VirtualBox guest additions in Linux Ubuntu 19.04.
Step 10) Enable bidirectional clipboard in the settings of VM as below.
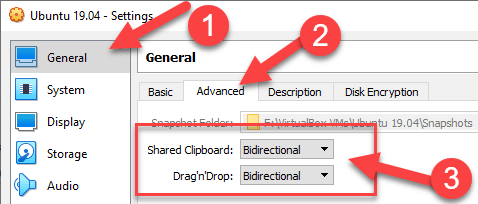
The bidirectional feature allows copying and pasting data between VM and host machine. Basically the clipboard can be shared with both computers. Also, with the drag’n’drop feature we can move the files and folders by mouse curser between host and virtual machines. It is a nice feature to transfer data or any type of content in between them.
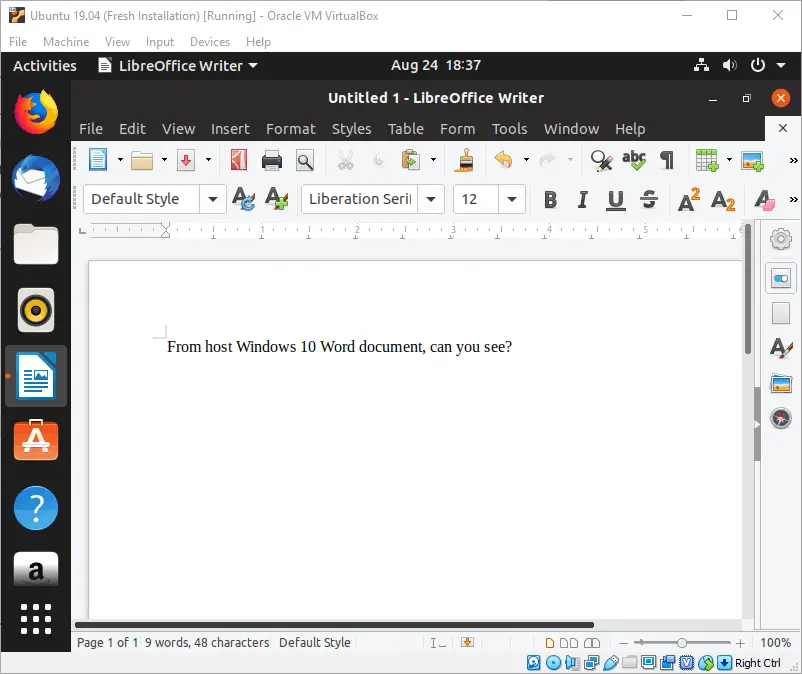
Here is my test, I could copy some texts from Windows 10 word file to Linux LibreOffice Writer.
VirtualBox shared folders between Ubuntu 19.04 and Windows 10
Step 11) Let’s set up the VirtualBox shared folders between Ubuntu 19.04 guest virtual machine and Windows 10 physical computer.
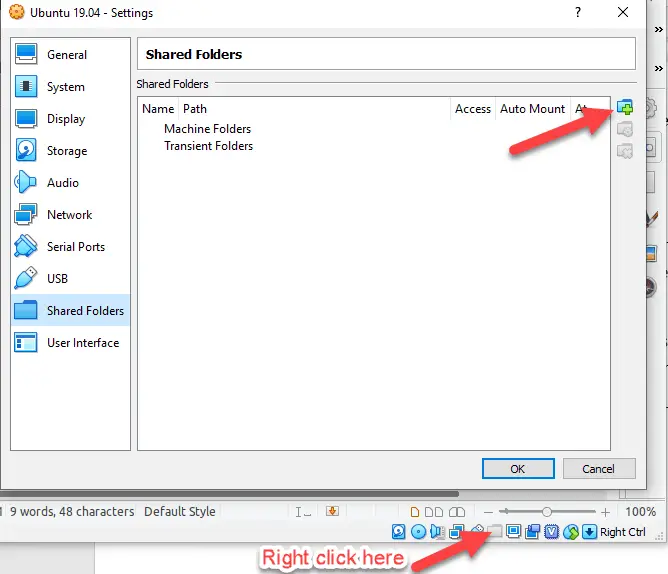
Decide the folder or partition you want to share from Windows 10 to Linux VM. Then, right-click on the shared folders icon (even while VM is working) and select add folder option.
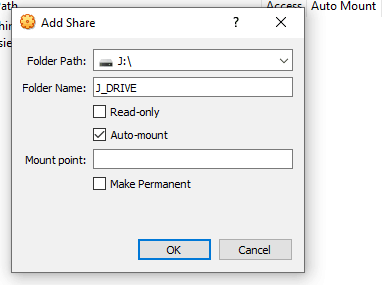
Browse the partition or a folder from the host computer. Set the ‘Auto Mount’ option. If you need to mount this share whenever you start the Ubuntu VM, then select the ‘Permanent’ option.
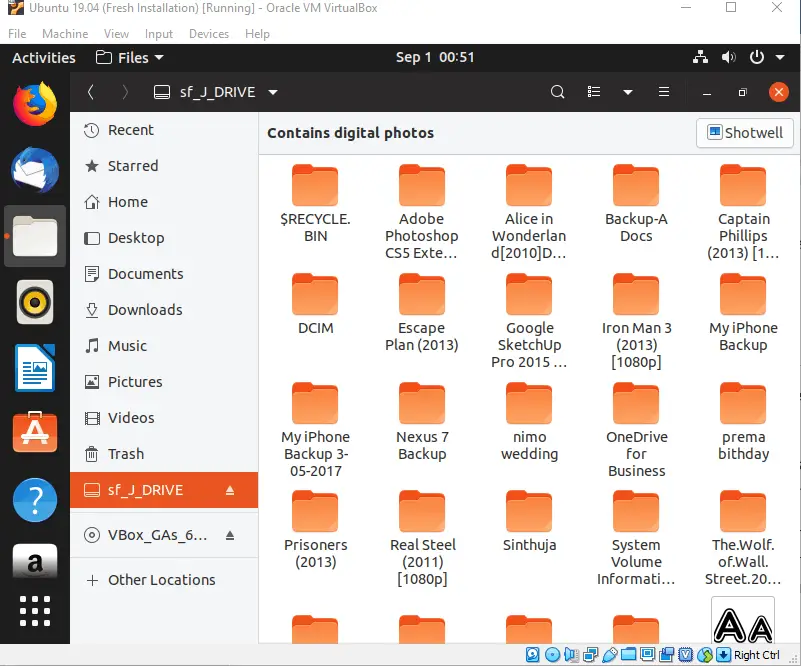
Not like earlier, nowadays without any additional commands, the shared folder will appear in Linux automatically (because we selected auto mount option).
Open it to access the Windows OS files and folders.
I got the following error the first time when I tried. I published another guide about fixing this error.
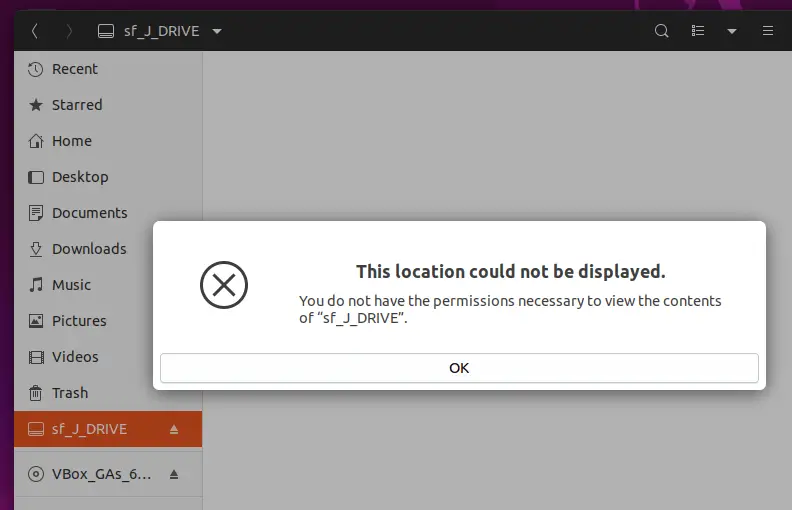
Once successfully the permission error fixed, you should be able to access the share.
We have covered most of the steps and possible errors/solutions to install Ubuntu 19.04 on Windows 10 host with Oracle VirtualBox. Hope the methods we mentioned here to setup bidirectional clipboard sharing access and VirtualBox shared folders feature are useful.