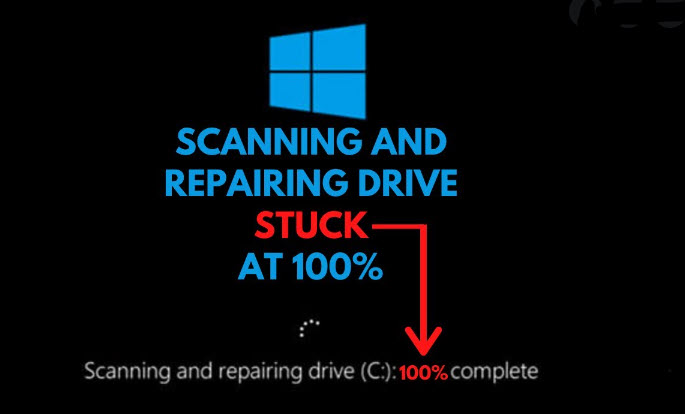
Is your Windows PC stuck after showing scanning and repairing drive C 100 complete? Multiple users have reported this error, and the problem doesn’t always occur at 100%. It can happen at 10% or 20%, or even 50%. There’s no specified number. It is a complex issue to deal with for amateur Windows users. So, stick around and learn the fixes.
The scanning and repairing drive stuck at 100% is a notorious Windows error. It can occur for several reasons and can last from a few minutes to several hours. More or less, the error can take your entire workday to resolve. So, in the following guide, we have discussed the details and a few ways to fix it.
What are the Reasons Behind the Error on Windows?
This is a well-known Windows error. Although, the percentage it occurs can vary.
- The forced shutdown of the Windows PC is one of the biggest reasons behind this error. Some users neglect to shut down PC manually. Instead, they long-press the Power button to turn it off. It may be easier, but bad for system files. It could lead to data corruption.
- The corrupted sectors in your hard drive can be responsible for this error. Having corrupted sectors in the hard drive is a big problem. It can give rise to several issues.
- Lastly, run the CHKDSK /F command while logging on to Windows. Most people don’t get it but running the command from the System Drive is wrong. The user will face CHKDSK cannot run because the volume is in use by another process error. You will have another opportunity to run the command when rebooting the PC. At that moment, the screen will show, Scanning and Repairing Drive.
So, these are the main reasons for the disk scanning stuck problem on your Windows PC. It is a popular Windows error that has been troubling users for generations. The problem was apparent on Windows 7, and it is still causing havoc on Windows 11.
Best Ways to Fix scanning and repairing drive C 100 complete in Windows 10/11
If you have already acknowledged the error on Windows and followed the reasons behind it. Then, this is the time to learn the solutions that can eliminate it.
1) Wait for the Process to Finish
Ironically, we are asking the user to wait for the process to finish, which is suspiciously taking a long time to end.
But before jumping into the troubleshooting steps, confirm if the process is truly stuck. If you have waited for an hour, wait for 30 more minutes.
As in some rare cases, the process took close to an hour instead of a few minutes. It did get finished by itself. However, an impatient user would have jumped to a conclusion without knowing all the facts.
2) Check the File System
The scanning and repairing of drive C 100 complete can also happen due to corrupted system files. So, running the System File Checker will detect the corrupted files and then repair them. But, to do it, you need to access Safe Mode.
- Turn on your computer, and as soon as the start-up gets initiated, hold the Power button to turn off the computer. Do this three times, and your computer will enter Automatic Repair.
- Click on the Advanced Options below.
- Then, navigate to Troubleshoot >> Advanced Options.
- Click on See More Recovery Options at the bottom of the following screen.
- Then, click on Start-Up Settings and followed by a click on Restart.
- Now, the Start-Up Settings menu will appear on the screen. You can select; either Safe Mode(F4) or Safe Mode with Networking(F5).
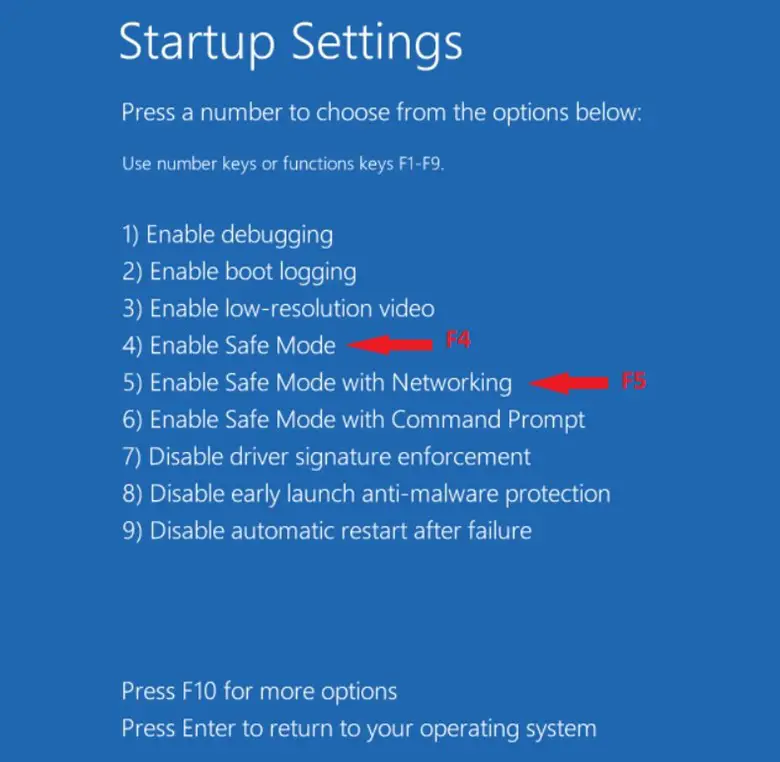
Now, the PC will reboot. After that, as the computer turns on, it will have a dark screen, and the screen will who Safe Mode at the bottom.
- Now, type cmd in the search box. Do right-click on the Command Prompt and select the Run as Administrator option.
- The command window will pop up. Type the following and hit Enter to execute.
sfc/scannow

Now, scanning will begin. This process will take several minutes; wait patiently. Do not close the command window until the verification message appears on the screen.
3) Disable Check Disk on Booting
If the previous method didn’t help and the scanning and repairing drive C 100% complete error still appears when starting your Windows PC, disable Check Disk on booting. You can modify the registry in Safe Mode to disable CHKDSK.
1. So, enter Safe Mode using the steps mentioned in the previous method.
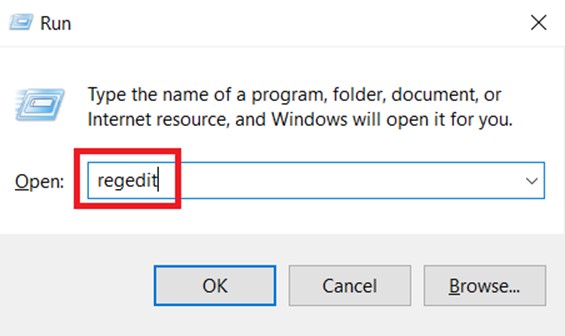
2. Now, press the Windows + R keys on your keyboard, and the RUN dialog box will appear.
3. Type, regedit, and hit Enter to click OK.
4. On the popped-up window, select the Session Manager and double-click on BootExecute on the right side to continue.
HKEY_LOCAL_MACHINE\SYSTEM\CurrentControlSet\Control\Session Manager
5. Another small window will pop up. Here, you need to change the Value Data to autocheck autochk /k:c* and click OK to save the change.
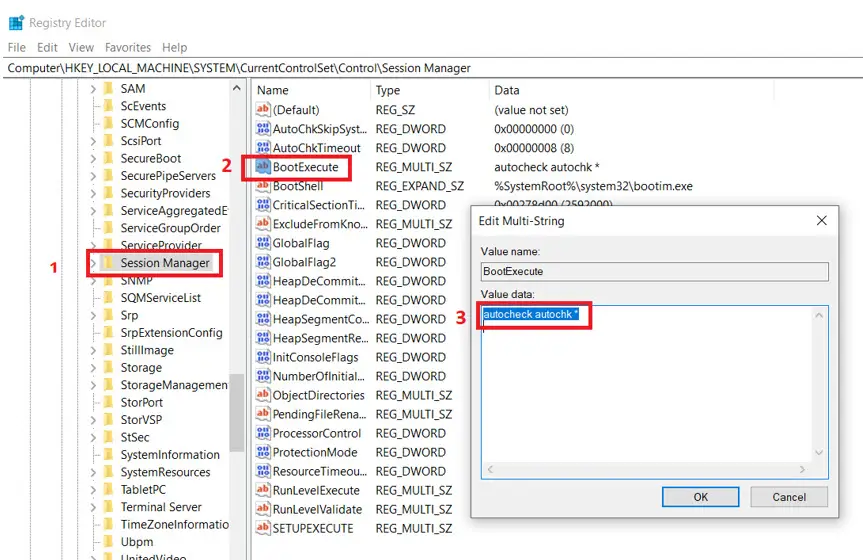
After this, exit the Windows Safe Mode and reboot your computer. The steps should fix the scanning and repairing loop you are facing.
4) Run CHKDSK in Safe Mode
Besides the previous solutions, the only other way to fix this problem involves running the CHKDSK command in Safe Mode. So, if the problem is still bothering you, use this method.
- As usual, open Windows in Safe Mode and run the Command Prompt with Administrator privilege.
- In the command window, type chkdsk c:/f and hit Enter to execute.
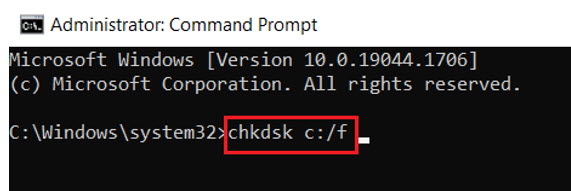
Let the process continue. You may get a message stating that the process should continue when the operating system starts the next time. So, type Y to continue.
After the repair process is complete, reboot the computer, and everything should be back to normal again.
5) Run System Restore
Finally, you can use the system restore when you have run out of all the resources. It is an optional solution. If you go with this method, you will definitely lose all the data from the system drive. So, this is not a recommended option for most users.
If the situation is critical and you have no other means available, initiating the system restore is the best way to resolve the problem. You will lose all the recent files. At least the problem won’t be there after the system restore. Having created a system restore point in advance will be helpful.
- Turn on your computer, and as soon as the start-up gets initiated, hold the Power button to turn off the computer. Do this three times, and your computer will enter Automatic Repair.
- Click on the Advanced Options below.
- Then, navigate to Troubleshoot >> Advanced Options.
- Select System Restore. In the following screen, click Next.
- Then, you have to select a system restore point. Lastly, click on the Finish button to proceed.
After the system restore is complete, reboot the computer. The scanning and repairing drive C stuck loop won’t appear anymore.
Wrapping It Up
So, there it is. The best and most effective methods for fixing Windows when the screen is scanning and repairing drive C 100 complete.
This is a problematic Windows issue, and you mustn’t rush into anything and implement some unverified fixes. This could make things worse. If you are having the problem, go through our list of fixes, and hopefully, you will be able to get the Windows back to normal before the entire day is wasted.


