There are times when you may have encountered issues related to Wi-Fi connectivity on your laptop and got stuck with the computer that keeps disconnecting from Wi-Fi. There could be many reasons that cause such issues. We generally see such issues on a laptop or portable devices. This article will try to cover different ways to troubleshoot the Wi-Fi disconnection issue you may face on your laptop or desktop that has a wireless adapter.
We have different options available to find and fix connectivity issues today, and we will try to cover from the very basics to the advanced method below.
9 Steps to Solve Computer Keeps Disconnecting from Wi-Fi Issue
Though the below demonstration was done on the Windows 10 computer, it is applicable for Windows 11 and Windows 8.1 computers and laptops.
1) Run Network Troubleshooter:
Whenever you encounter any network related issue, you should always try Network Troubleshooter that comes pre-built in Windows 10. This Troubleshooter is good enough to find and fix network-related issues, and in most cases, it can do, and users don’t have to move to other troubleshooting methods.
To run the Network Troubleshooter and fix issues, here are the below steps:
- Go to the search bar and Type “Network Troubleshooter.”
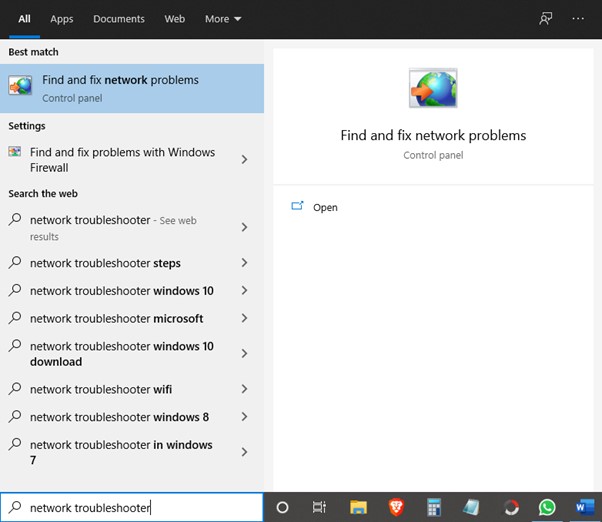
- You should see an application by the name “Find and Fix Network Problems” -> enter
- Internet Connections window will open -> hit Next
- In this step, the Troubleshooter will try to find and fix network related issues by clearing DNS cache, resetting network adapter etc
- Please wait for the process to complete; once done, it will try to check whether your device can connect to the Web or not. Once it validates, it will show a message like “Troubleshooter Couldn’t identify the problem” or “Your internet connection is restored” if it can fix the issue.
2) Restart the Computer and Networking Device:
This method may sound confusing, but there are high chances that some background services or tasks stopped working on the laptop or router and caused networking connectivity issues.
Restarting computers and devices also helps to clear network logs, and it allows the device to get fresh new IP assigned by the DHCP server. Let’s start with the steps below how to do that effectively:
- Close all running applications on the laptop, shutdown and remove all power cable
- Now look for the on/off button on the router and switch it off
- Wait for a minute or two for the network settings to refresh in the backend
- Turn on the router from the on/off switch and wait for the Internet to get connected
- Now start the computer, connect to Wi-Fi and see how it works
3) Set Networking Sharing to Home:
This is the next step to troubleshoot the laptop that keeps disconnecting from the Wi-Fi issue. In this method, we will look for the network type configured under network settings and will set it to Home if it is not selected. Here are the steps:
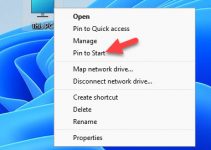
- On the bottom right-hand side corner, select your Wi-Fi, click on properties
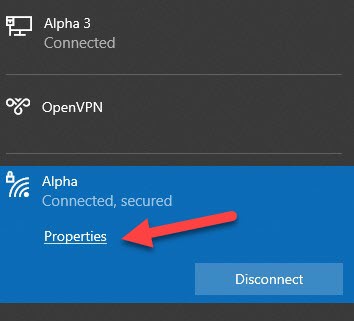
- It will open a network profile, and there will be an option to select between “Public” and “Private.”

- Select Private and check internet connectivity.
4) Reset Wi-Fi Services:
This is the next step in the Wi-Fi troubleshooting guide; in this method, we will try to reset Wi-Fi services that run in the background and thus are responsible for Wi-Fi connectivity by enabling and disabling them. Here are the steps below:
- Go to start -> In the search bar, type “services.msc” and enter
- A services window will pop up, scroll down and look for WLAN AutoConfig services
- Do a right-click on the services and select properties
- In the next window screen from the services status section, click on STOP, wait for the process to complete
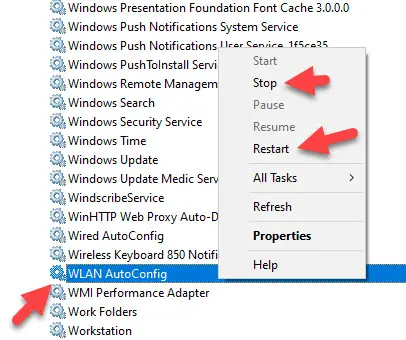
- After 5 seconds, click on START -> Apply -> OK
Now navigate to the Wi-Fi network section and see if that fixes the issue. You need to restart the laptop when services are reset, as it takes a while to refresh the whole network cache and start fresh.
If in case this method fails to solve your issue, please try the next method.
5) Power Management:
Power Management is one the most crucial part of a laptop or any electronic device. It maintains and manages the power in and outflow and thus controls all components that drag power out.
Due to a power management issue, the Wi-Fi service cannot work, and this laptop cannot connect to the network. To troubleshoot this issue, we need to disable an option available under power management that may solve the issue, and let’s understand the steps below:
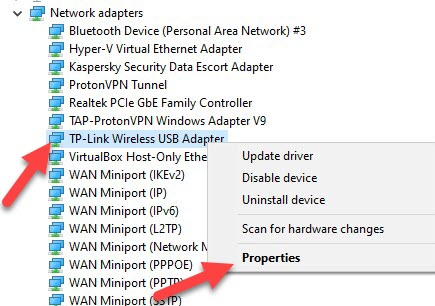
- Go to Start and type in the search bar as “Device Management” -> enter
- The Device Manager will open on your screen
- Go to Network Adapter section -> select your network device -> right click -> properties
- In the Wireless device adapter properties -> power management -> uncheck “Allow the computer to turn off this device to save power”, by default this option is enabled
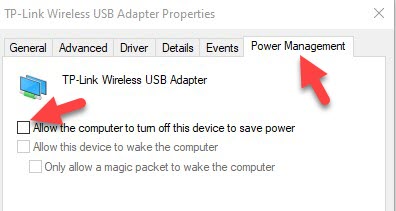
Close and restart the computer to see whether this method is helpful.
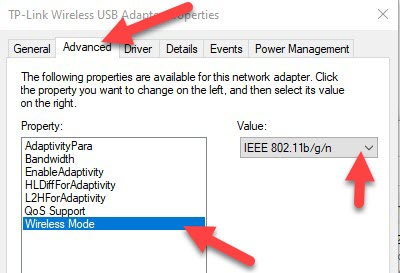
6) Disable 802.11 n Wireless Radio:
In modern-day laptop the default radio mode it supports are 802.11 a/b/g/n/ac. If the router is old and doesn’t offer a newer radio mode like n or ac, it won’t connect or disconnect at regular intervals.
The best way to troubleshoot the computer keeps disconnecting issue: temporarily disable n or ac band and see how it works. Let’s understand below how to do that:
- Go to start -> Type in the search bar “network and internet” -> enter
- In the Windows Settings -> select “Network & Internet” -> Change adapter options
- Select wireless device -> right click -> properties -> Client for Microsoft Networks -> Configure
- In the next screen, select “Advanced” tab -> Wireless Mode -> Select IEEE 802.11 b/g -> ok
- Restart the laptop and check how the new changes are affecting the connectivity
7) Check Router Configuration (channel):
There are times due to Wi-Fi network congestion, and your wireless-capable devices are unable to connect. The primary reason is because of network channel on which your Wi-Fi router is transmitting wireless signal coincides with another Wi-Fi network used in your neighbour.
The other person might be using the same wireless band router, i.e., 2.4 GHz, which has limited channels and might be conflicting with yours.
The best way to find current channels transmitted by all wireless devices nearby is to use a network scanning app like WifiInfoView.
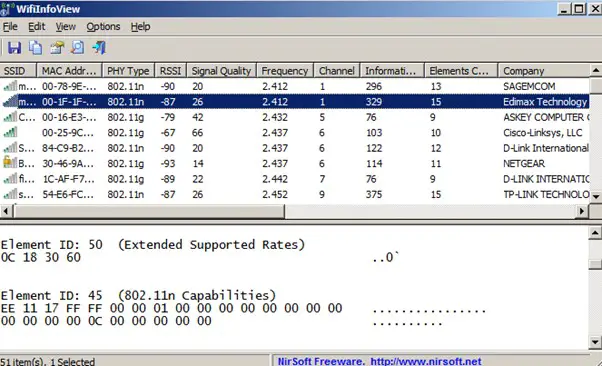
These applications can be used to find current channels used by your nearby router and use different channels to keep the network congestion free using the same router.
After that, the laptop Wi-Fi connection issue should be resolved as the laptop should connect to the congestion-free network.
8) Network Driver Update:
We have seen in few cases that the device driver gets corrupt due to a recent hardware or software changes or becomes outdated.
If the driver files are not currently, there are high chances they won’t connect or recognize the available wireless network.
To troubleshoot and fix this issue, the only way out is to update the network device drivers. Let’s understand the steps below how to do that:
- Go to start -> Type in the search bar “device manager” -> enter
- Under network adapter -> you should name the network adapter installed on your laptop
- Do a right-click on the network adapter and select update drivers
- Wait for the process to complete and then try again to connect to Wi-Fi
- If in case that doesn’t work out, then the network adapter needs to be reinstalled from the manufacturer website
- In this case, go to laptop manufacturer website -> enter model number -> select operating system and under drivers -> look under network drivers
- Download and install the driver, reinstall manually -> restart the PC and check
9) Change DNS Server:
There are times when the device can connect but keep disconnecting, and one more reason could be because of the DNS server.
DNS server is responsible for converting web address to IP and vice versa. If it is not working properly on a network device, there are high chances that you may encounter frequent computer disconnecting from Wi-Fi issues.
To resolve this issue, it is best to use public DNS available like Google DNS. Let’s understand below how to set it up.
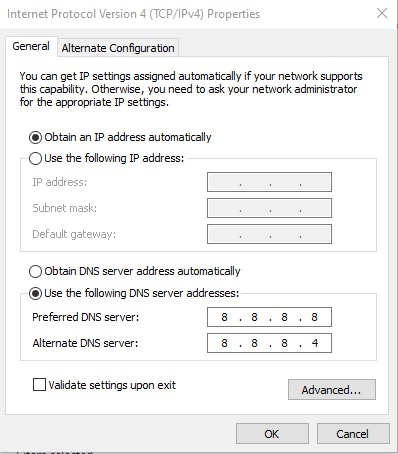
- Go to start -> In the search bar type “ncpa.cpl” -> enter, it will open IP4 TCP/IP properties window
- In the “use the following DNS server address” enter 8.8.8.8 as preferred DNS and 8.8.8.4 as alternate DNS server -> ok
- Test your Wi-Fi connectivity issue and see how it works
Conclusion:
This article tried to cover almost all different ways using which computer keeps disconnecting from Wi-Fi issue can be resolved.
There is no one fit all solution available; hence, one should try all the different options mentioned above to fix such an issue permanently.
Please let us know in the comment section below which option helped you fix your laptop’s disconnection issue on your laptop?